The SAMi update product feature helps the PO persona to edit, delete, or set permissions to an existing product in the SAMi portal.
Edit Product
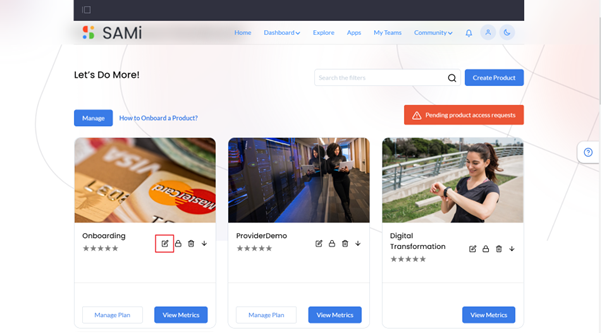
To edit the product from Product Owner Dashboard, do the following:
Step 1: Login as a Product Owner.
Step 2: Enter the URL: http://sam-portal-dev.demo.sidglobal.cloud/home in the browser.
You will land on to Product Owner Dashboard.
Step 3: From Product Owner Dashboard, browse the product to edit it.

Step 4: Click on Edit icon in the product card.
The Product details page appears.
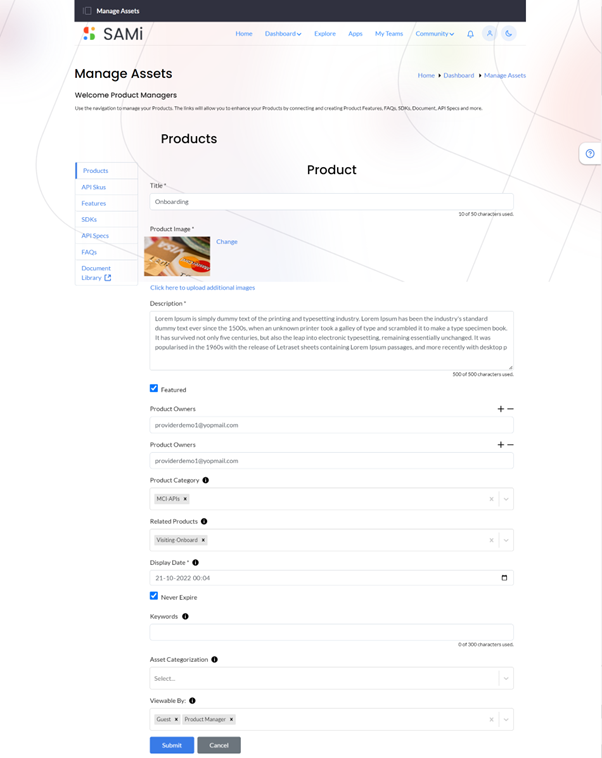
In Product page, add or update any of the sections like, Title, Description, Product Category, Check or uncheck the Featured checkbox, if you’d like to make a featured product to a general product or vice versa, Related Products, Display Date, Asset Categorization, and Viewable By.
Step 5: Click Submit.
A success message is displayed stating, the product is successfully updated.
Delete Product
To delete a product from Product Owner Dashboard, do the following:
Step 1: Login as a Product Owner.
Step 2: Enter the URL: http://sam-portal-dev.demo.sidglobal.cloud/home in the browser.
You will land on to Product Owner Dashboard.
Step 3: From Product Owner Dashboard, browse the product to delete it.
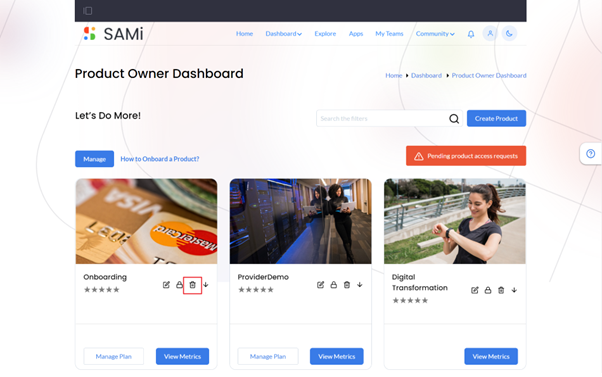
Step 4: Click on Delete icon in the product card.
The selected product is deleted. A confirmation message appears stating, “Product Deleted Successfully.”
Set Permissions
To set permissions for a product from Product Owner Dashboard, do the following:
Step 1: Login as a Product Owner.
Step 2: Enter the URL: http://sam-portal-dev.demo.sidglobal.cloud/home in the browser.
You will land on to Product Owner Dashboard.
Step 3: From Product Owner Dashboard, browse the product to set its permissions.
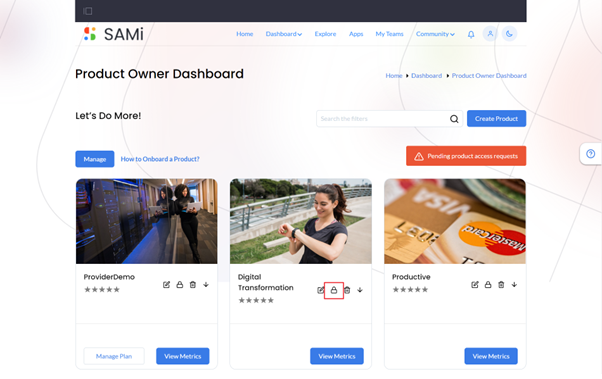
Step 4: Click Permissions icon.
The Manage Permissions page is displayed.
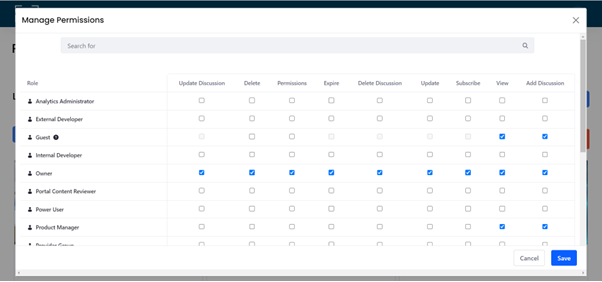
Step 5: In the Manage Permissions page, the product owner can set product permissions based on different user roles by clicking on required checkboxes.
Note: Also, in Manage Permissions, you can search specific user roles to grant permissions by using keywords in the search field.
Step 6: Click Save.
The selected users are granted permissions based on the selections made.
Step 7: Click Cancel to abort setting permissions and close the window.