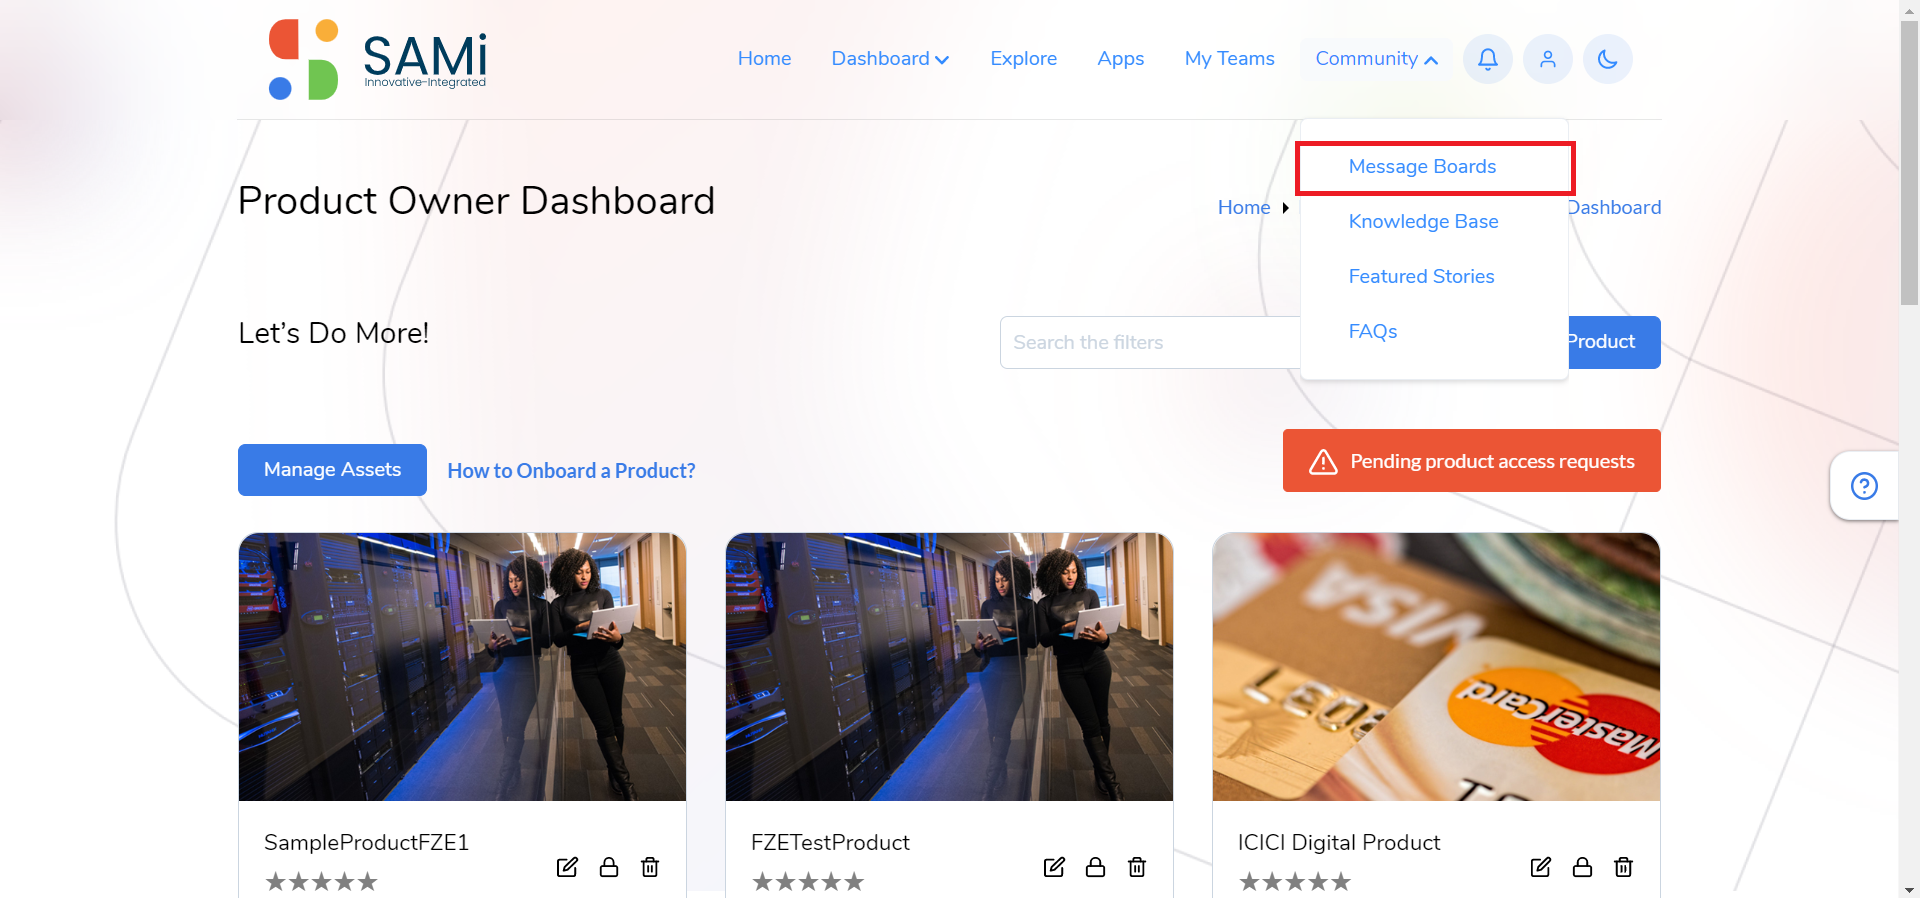
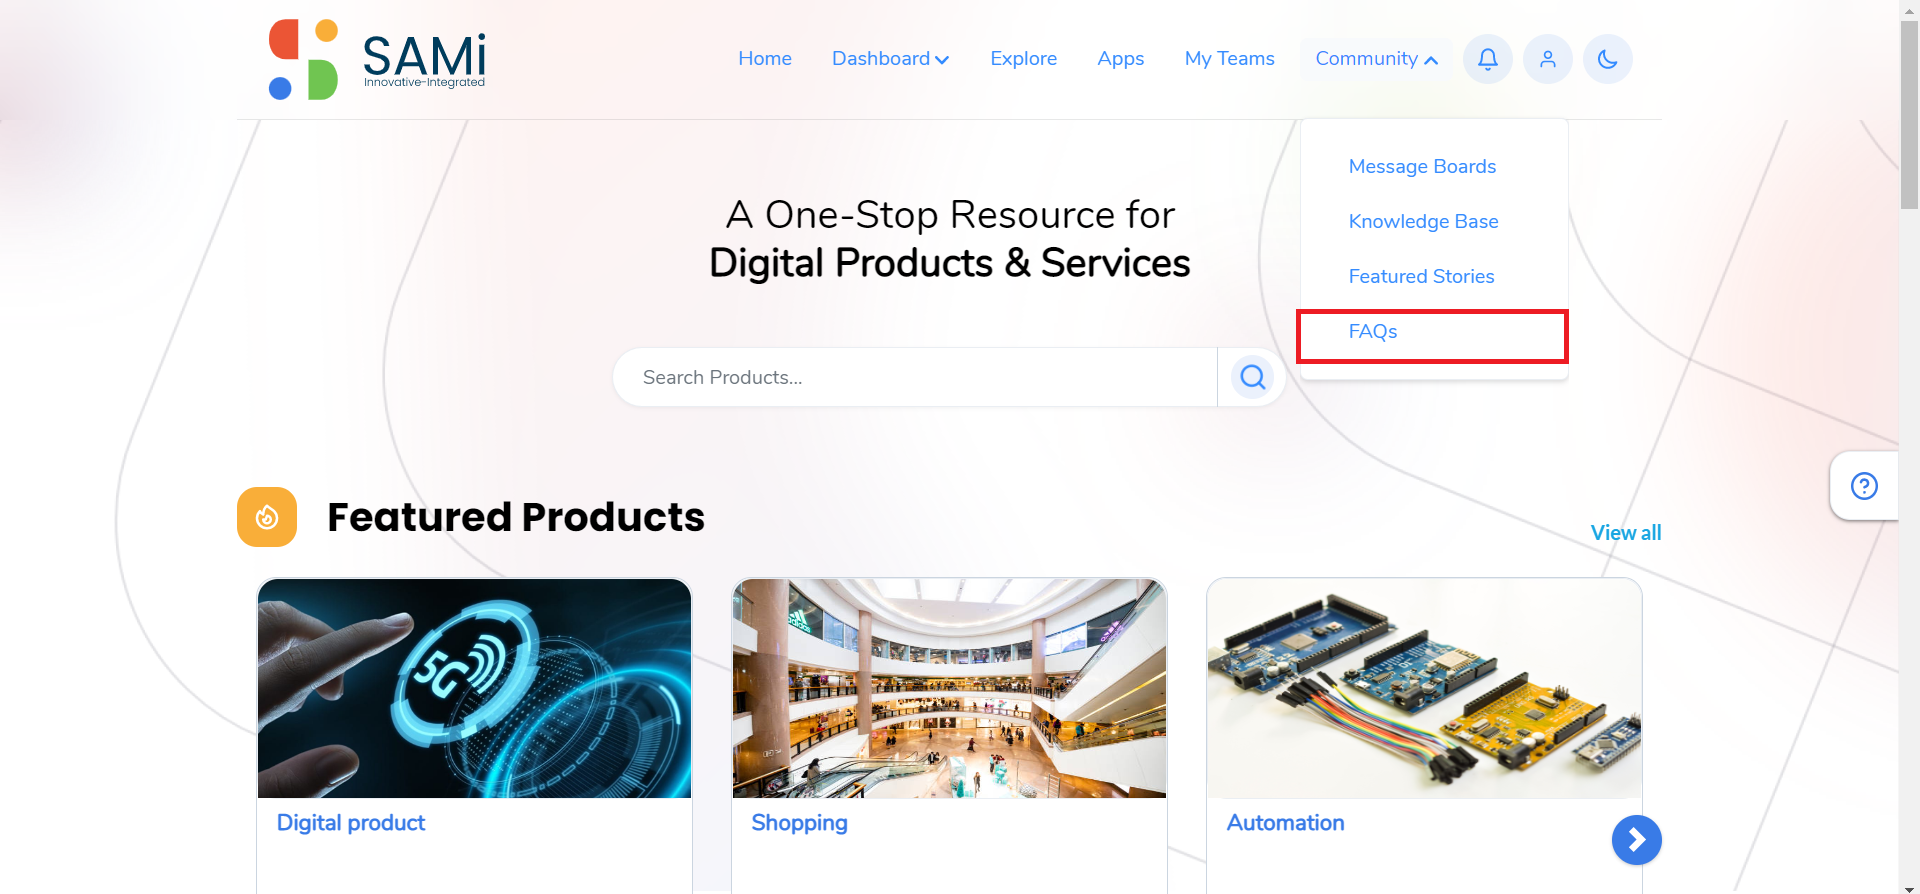
As part of the SAMi support initiative, the Product Owner is allowed to participate in collaborative knowledge sharing activities by posting message posts and subscribing to the Community page. The Community page will allow you (The Product Owner) to navigate to:
- Message Boards
- Knowledge Base
- Featured Stories
- FAQs
Message Boards
To view the message boards from the main menu do the following:
Step 1: Login as a Product Owner.
Step 2: Enter the URL: http://sam-portal-dev.demo.sidglobal.cloud/home in the browser.
Once you login, you will land on to Product Owner Dashboard.
Step 3: Form the Dashboard, click Community, and then Message Boards.
The Message Boards page is displayed.
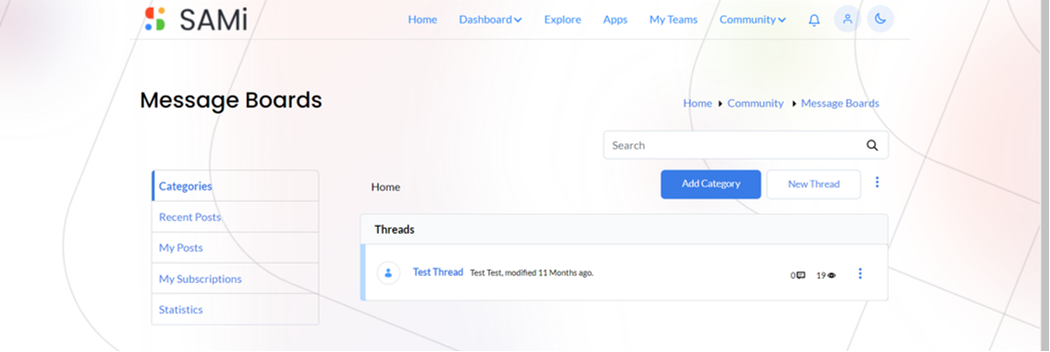
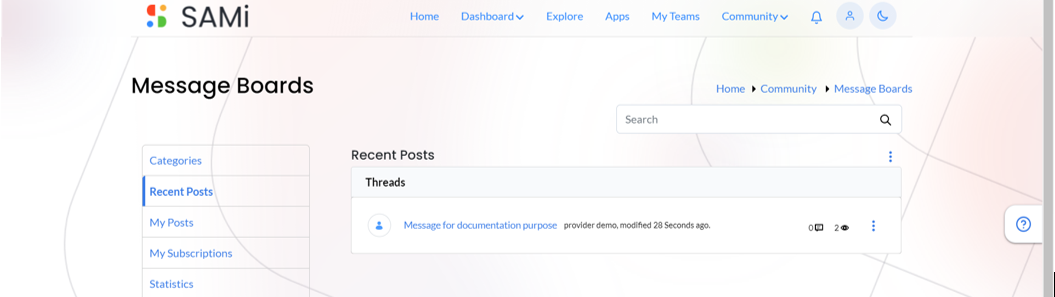
Step 4: In the Message Boards page, you can navigate to these features and perform different operations:
- Categories
- Recent Posts
- My Posts
- My Subscriptions
- Statistics
Add a Category
In Categories, to add a new category, do the following:
Step 1: Click Community and then Message Boards option in main menu.
The Message Boards page appears.
Step 2: Click Add Category button.
The Add Category page is displayed.
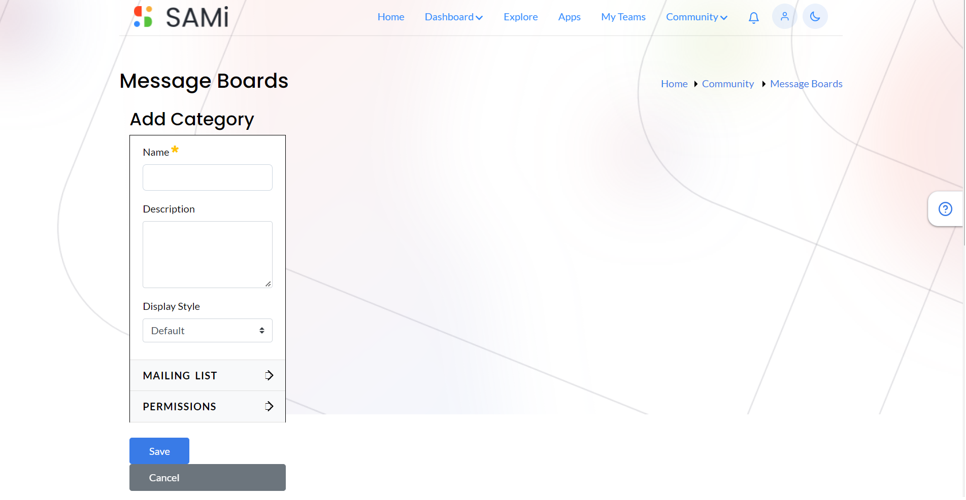
Step 3: In Add Category page, do the following:
- Enter the Category Name in the textbox.
- Enter the Description in the text area.
- Select the Display Style, if you do not wish to select a style keep the Default
- Mailing List, select the mailing list as Active and Allow Anonymous.
- Viewable By, select viewable by using the dropdown, as Guest, Admin user and so on…
- More Options – If you wish to select a few more options.
- Click Save.
The category is added successfully.
- Click Cancel, if you wish to cancel adding a category, and close the window.
New Thread
The Product Owner is allowed to start a new thread of messages and at the same time post it in the message boards.
To start a new thread in the message boards, do the following:
Step 1: From Message Boards, click on New Thread.
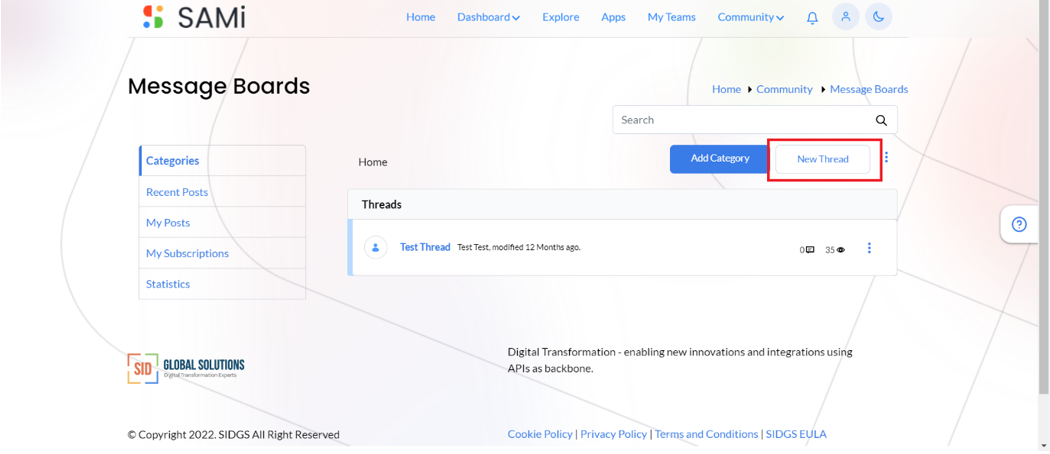
The Add Message page appears.
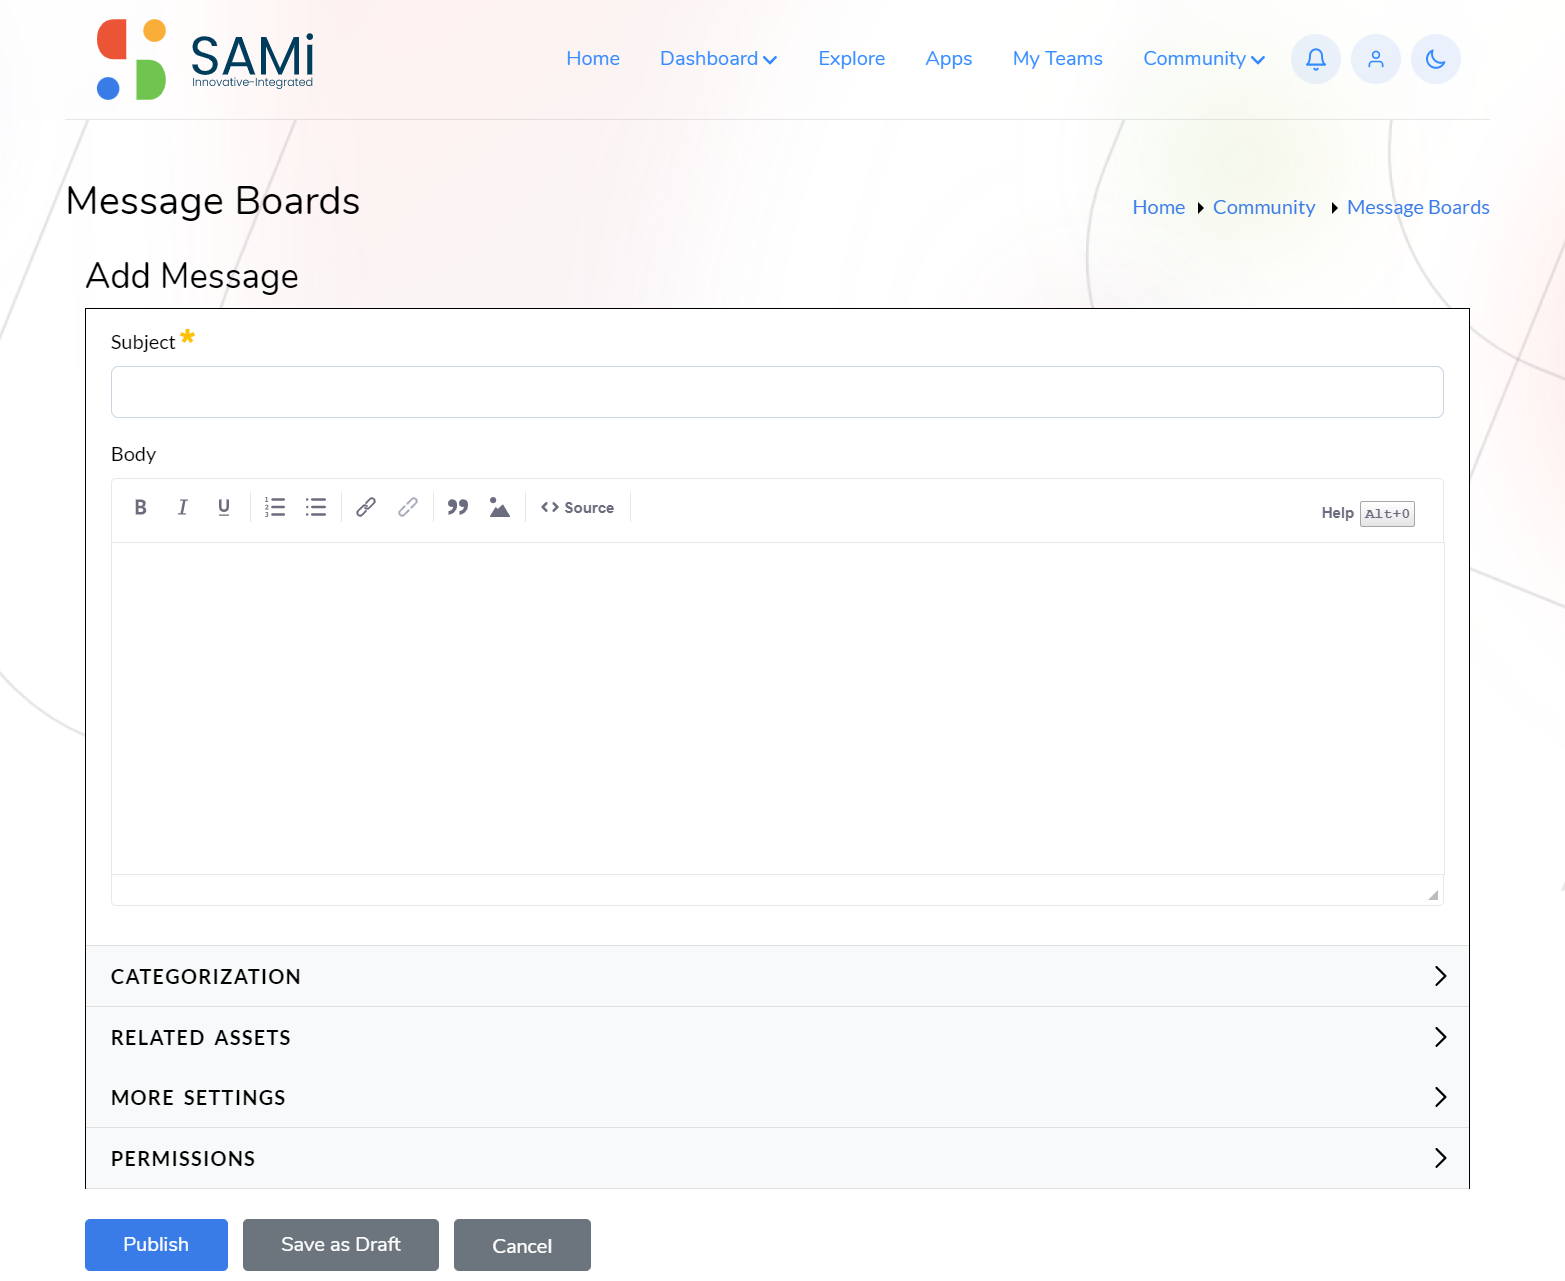
Step 2: In the Add Message page, enter the following:
- Subject – Enter the subject in the textbox provided.
- Body – Enter the message in the message body text area.
- Optionally, you will be able to:
- Upload attachments
- Select Categorization
- Select the Related Assets
- Do More Settings
- Permissions
- Viewable by – This is to provide viewing permissions to different roles.
- More Settings – to perform a few more settings.
- Click Publish to publish the message to the message board.
- Save as Draft – Click on Save as Draft, if you wish to save the message and publish it later.
- Cancel – Click Cancel, if you wish to abort and close the message page.
Recent Posts
The Recent Post will help you to view all the recently posted messages by all the members in the Message Boards of a Community.
Step 1: To go to the recent posts, On Message Boards, click on the Recent Posts tab on the left navigation.
Step 2: In the Recent Posts, when you click on 3 dots menu option.
The dropdown menu appears.
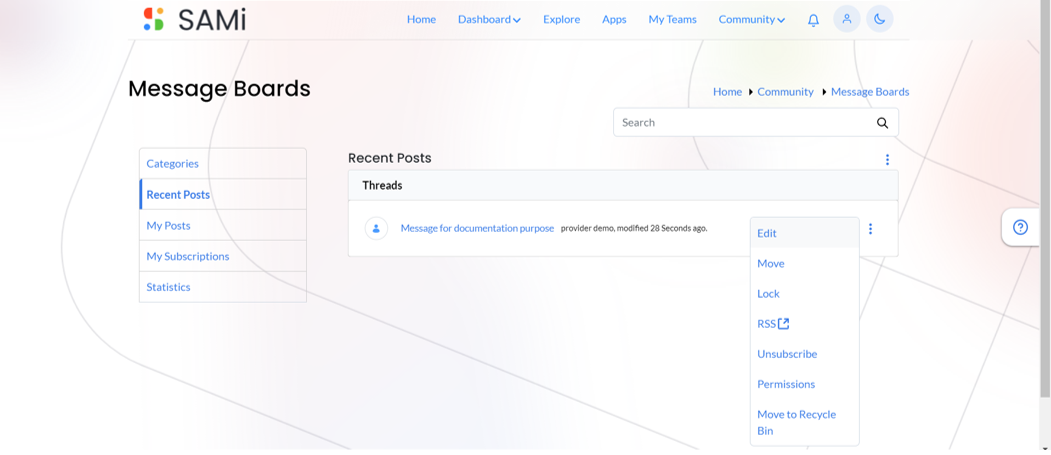
In the Recent Posts, when you click on 3 dots menu option, you will be allowed to do the following operations with the posts:
- Edit
- Move
- Lock
- RSS Feed
- Unsubscribe
- Permissions and
- Move to Recycle Bin
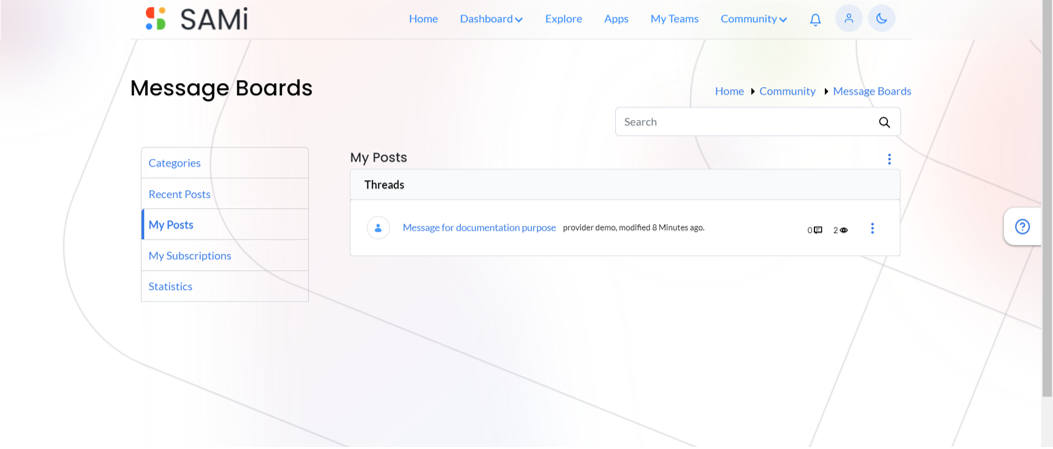
My Posts
The My Posts will display all the logged-in users (Product Owners Posts) and will be able to perform the same operations as done in the Recent Posts.
Step 1: To go to My Posts, On Message Boards, click on My Posts tab on the left navigation.
My Subscription
The My Subscription will allow you to view all your message subscriptions.
Step 1: To navigate to the subscription, from Message Boards, click on My Subscription.
The My Subscriptions page is displayed with all your subscriptions.
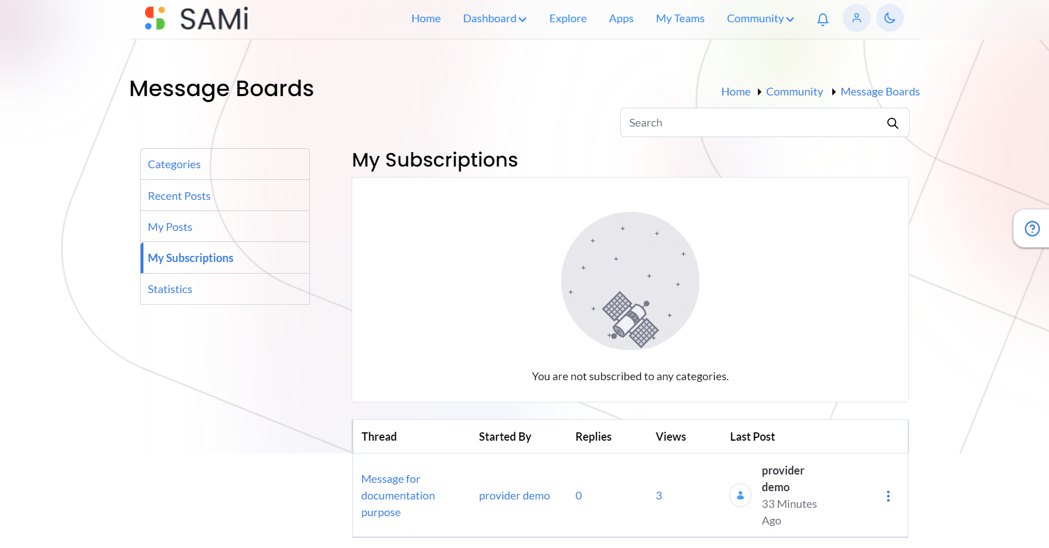
The My Subscription will display all the logged-in users (Product Owners Subscriptions) and will be able to perform the same operations as done in the Recent Posts.
Statistics
The Statistics page will allow you to view all the statistics about your number of posts, and the participants who visited your posts. Additionally, will also display the number of categories.
Step 1: To navigate to Statistics, from Message Boards, click on Statistics.
The Statistics page is displayed with all the user posts statistics and the top message posters.
Note: This is a read-only page, you cannot perform any operations on it except viewing the posts and the statistics.

Knowledge Base
The Knowledge Base will allow you to view articles, subscribe, print, move and delete the knowledge base articles on the Community page.
To view the Knowledge Base from the main menu do the following:
Step 1: Login as a Product Owner.
Step 2: Enter the URL: http://sam-portal-dev.demo.sidglobal.cloud/home in the browser.
Once you login, you will land on to Product Owner Dashboard.
Step 3: Form the Dashboard, click Community, and then Knowledge Base.
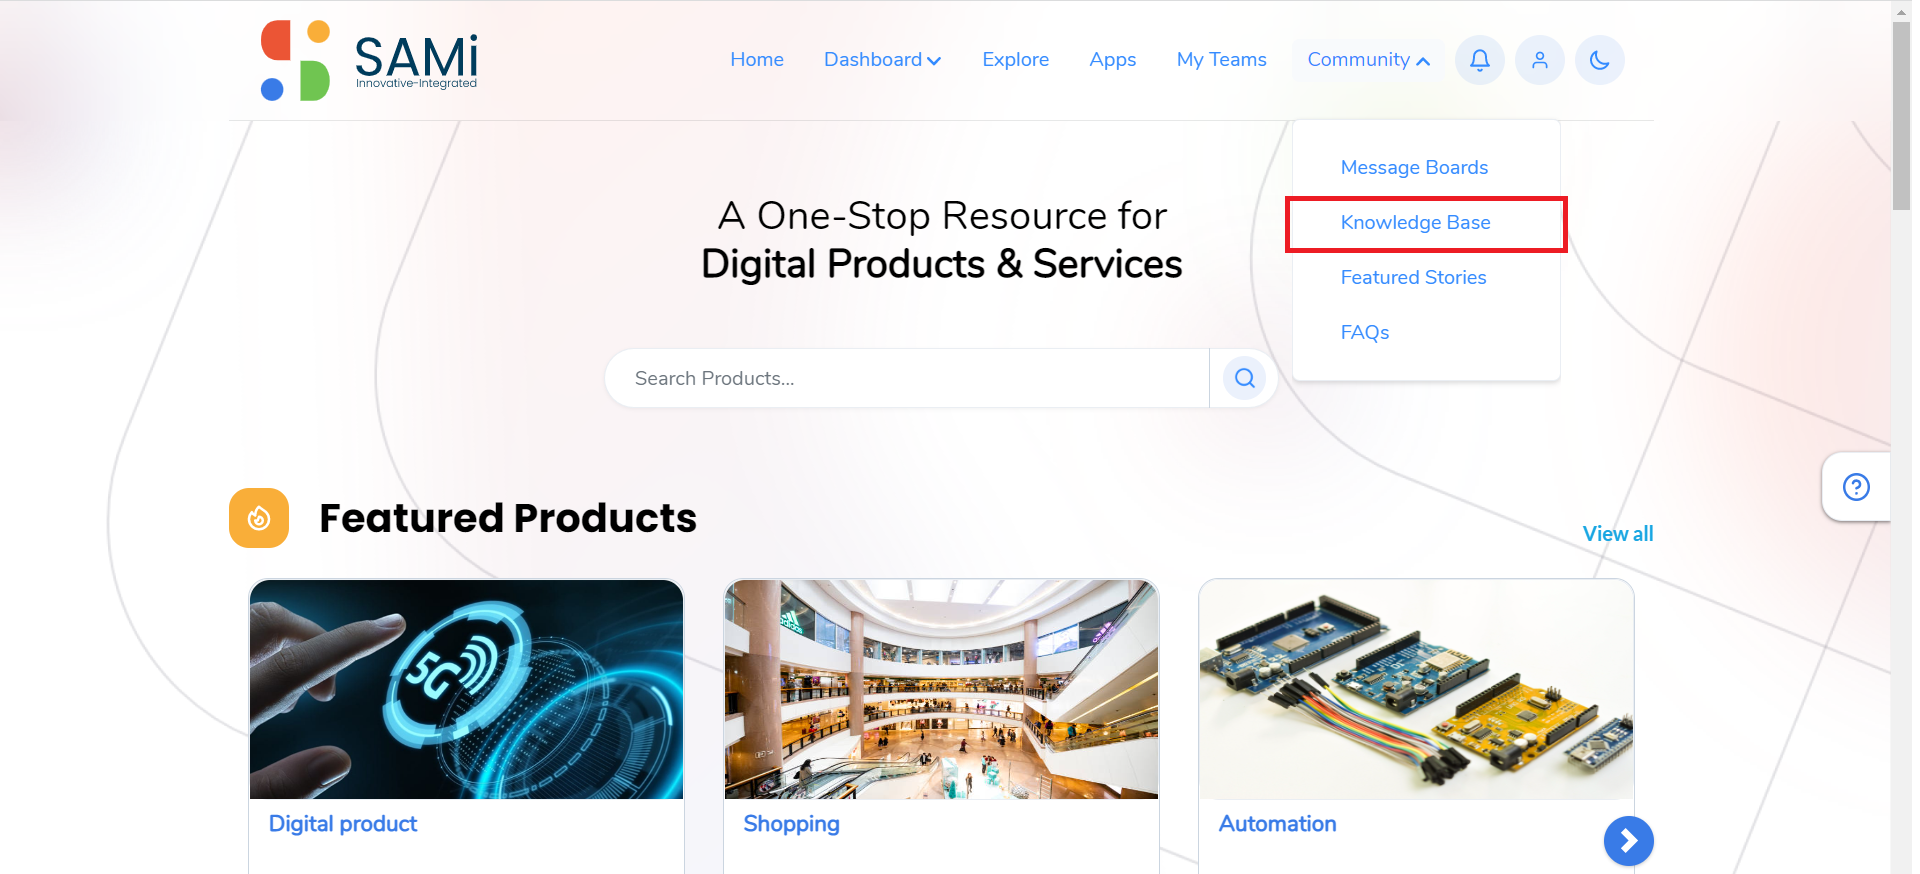
The Knowledge Base page is displayed.
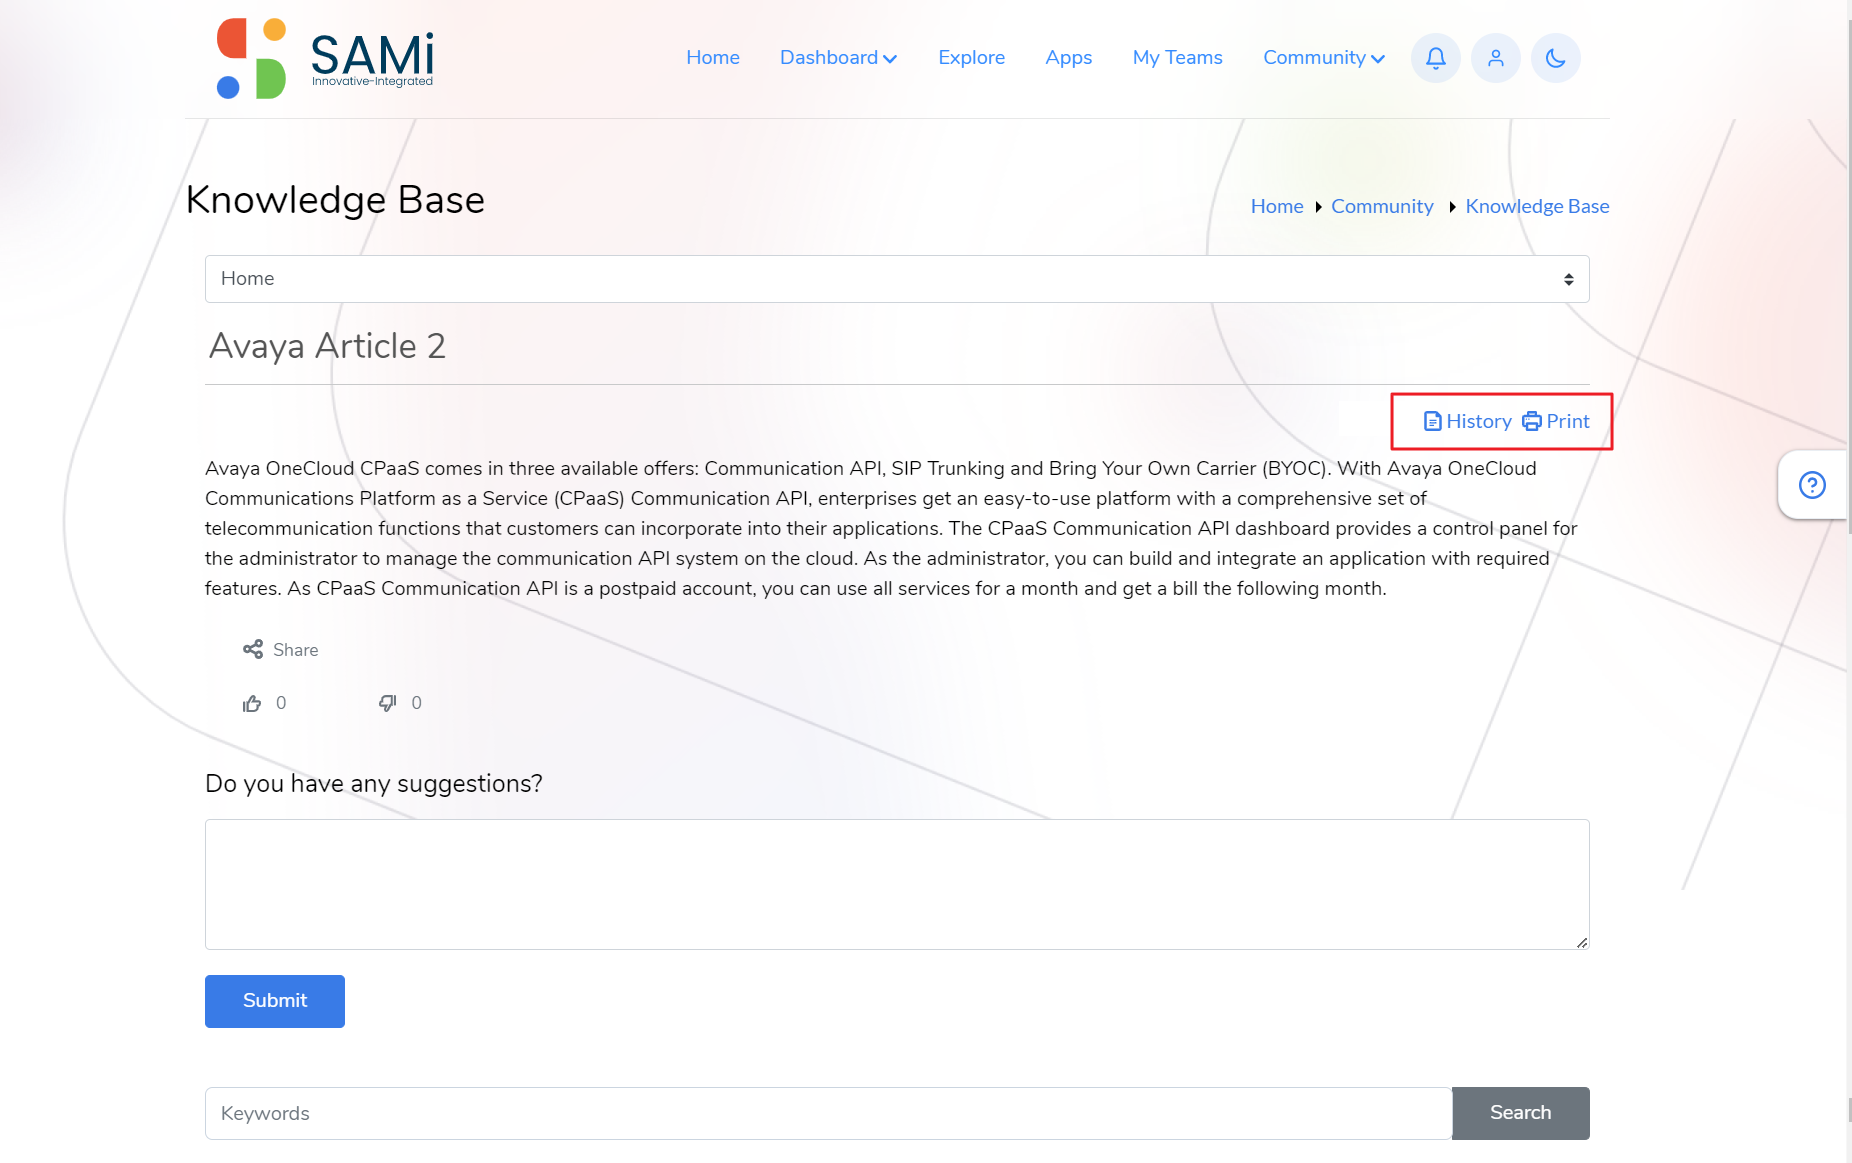
In the Knowledge Base page, you will be able to search articles, print the article, and view history.
Additionally, you will be able to write a suggestion and submit it to the community page.
Featured Stories (Blog Entry)
The featured stories will help you to add blog entry posts and perform more publishing and accessing options.
To view the Featured Stories from the main menu do the following:
Step 1: Login as a Product Owner.
Step 2: Enter the URL: http://sam-portal-dev.demo.sidglobal.cloud/home in the browser.
Once you login, you will land on to Product Owner Dashboard.
Step 3: Form the Dashboard, click Community and then Featured Stories in main menu.

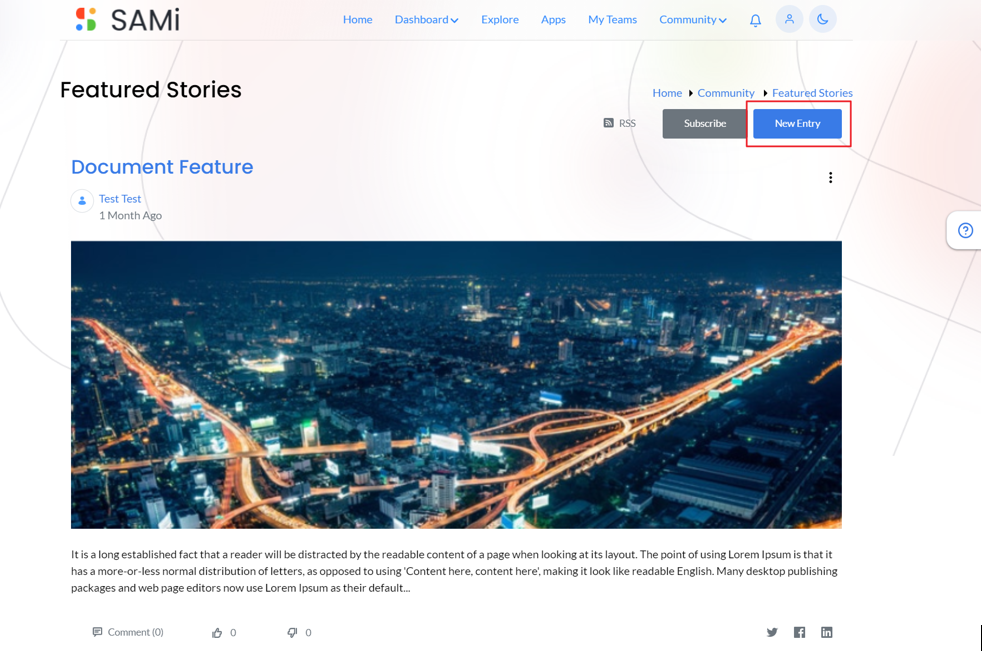
The Featured Stories page is displayed.
Step 4: In the Featured Stories page, click New Entry button, to add a new featured story to the Community page.
Step 5: The New Blog Entry page is displayed in content editor mode.
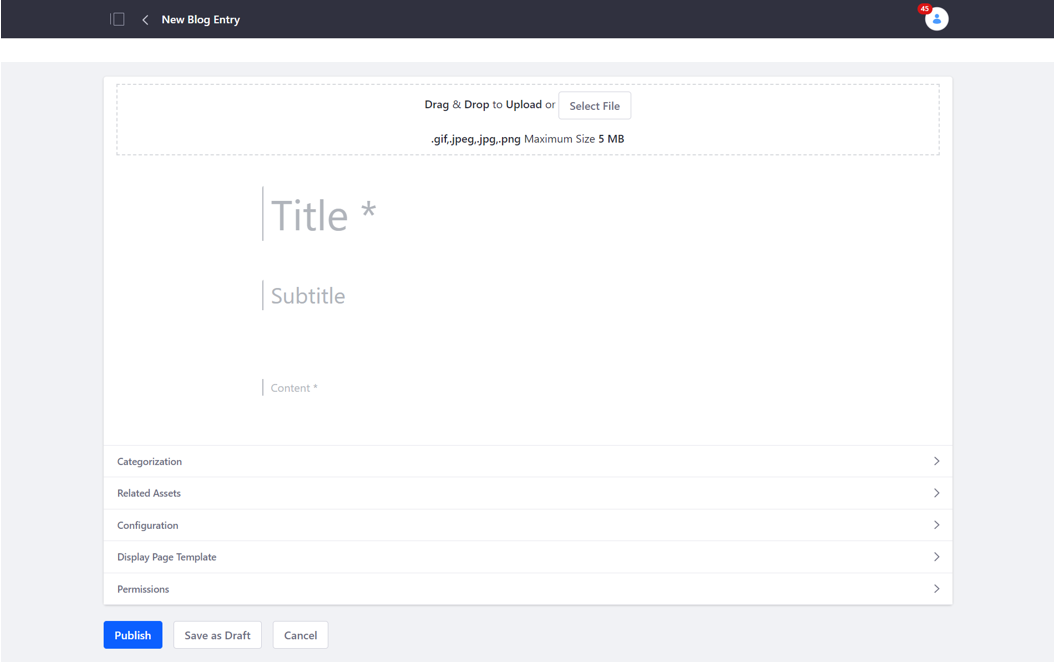
Step 6: In the New Blog Entry page, do the following:
- Drag & Drop a file or click Select File to upload a picture of not more than 5 MB in size
- In the body of the blog editor, enter the Title, Subtitle, Content
- Additionally, Select Categorization to add the blog to the selected category, enter the existing assets, for instance, product, catalog etc.
- Select Related Assets, by browsing through the portal.
- Select the Configuration like, Automatic or Custom, and also provide the Blog Entry URL in the textbox.
- Select Abstract by choosing “use the first 400 characters of the entry content” or Custom Abstract, when you choose Custom Abstract, it is mandatory to enter the Description to it.
- Drag and Drop to upload Small Image File or browse to select it from your local drive. Note: the image file size should not exceed 5 MB.
- Enter the Display Date and time, if you wish to change from the current date and time to some future date and time.
- By default, the Pingbacks are enabled to Yes, if you wish you can set it to No.
Note: Pingbacks are the comments created when you link to another blog post.
- Select Display Page Template, if you choose a specific template, a Select button appears for you to browse and upload a template designed by you, as these templates can be used for a new blog post. If you do not wish to use a Display Page Template, you can choose the Default Template.
- Permissions – select the user roles who could have permissions to view the blog post by clicking Viewable by.

- Optionally, if you wish to add more roles-based permissions by clicking More Options under Permissions, and choose the checkboxes against the role like, Update Discussion, Delete Discussion, Permissions, Update, View, and Add Discussion.

- Click Hide Options, if you wish to close the More Options
Step 7: Click Publish, to publish the New Blog Entry.
Step 8: Click Save as Draft, if you wish to save the blog entry and publish it later.
Step 9: Click Cancel, if you wish to cancel publishing the blog entry and close the window.
Subscribe or Unsubscribe from a Featured Story
To Subscribe or unsubscribe from the Featured Stories from the main menu do the following:
Step 1: Login as a Product Owner.
Step 2: Enter the URL: http://sam-portal-dev.demo.sidglobal.cloud/home in the browser.
Once you login, you will land on to Product Owner Dashboard.
Step 3: Form the Dashboard, click Community and then Featured Stories.
The Featured Stories page is displayed.
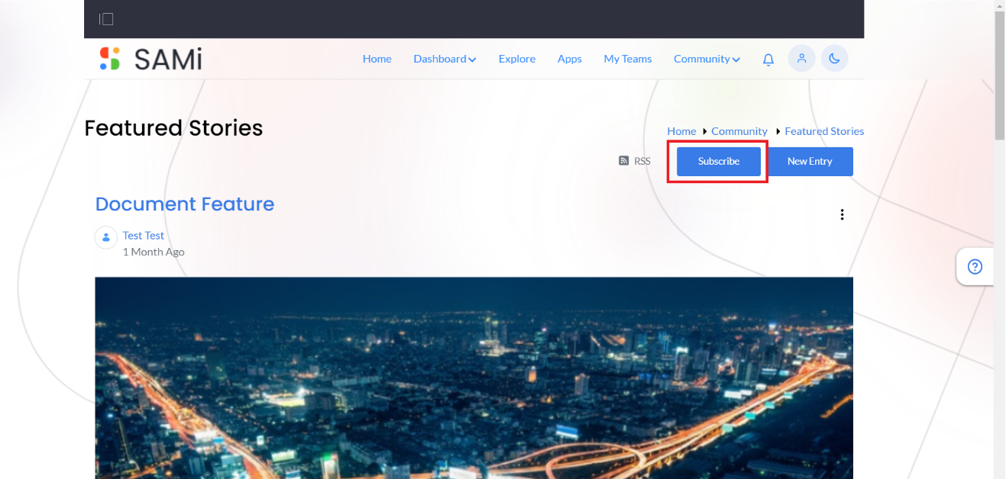
Step 4: In the Featured Stories page, click Subscribe button to subscribe to these featured stories in the Community pages.
The Featured Stories are successfully subscribed.
Step 5: Similarly, if you have subscribed to the Featured Stories earlier, and wish to unsubscribe for whatsoever reason, click the Unsubscribe button.
The Featured Stories subscribed earlier are successfully unsubscribed.
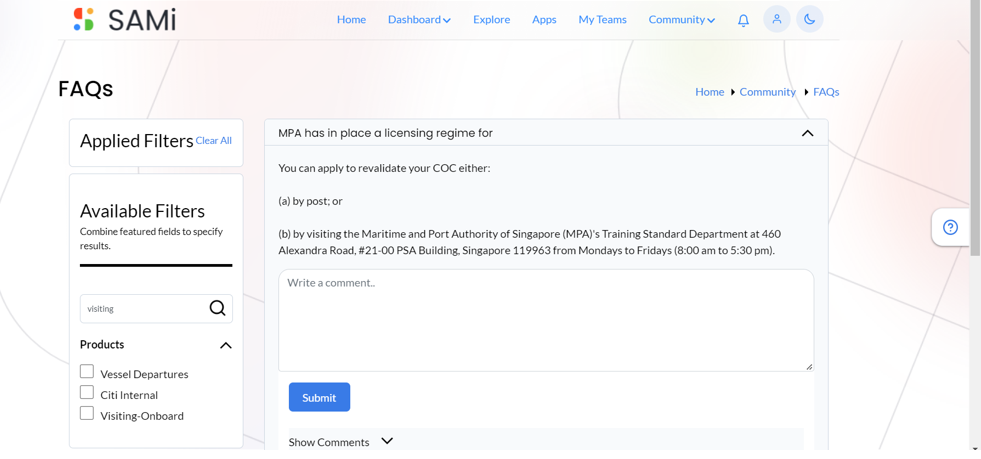
FAQs
The FAQs page allows you to write FAQs and submit it to the Community page.
To write FAQs on the Community page from the main menu do the following:
Step 1: Login as a Product Owner.
Step 2: Enter the URL: http://sam-portal-dev.demo.sidglobal.cloud/home in the browser.
Once you login, you will land on to Product Owner Dashboard.
Step 3: Form the Dashboard, click Community and then FAQs.
The FAQs page is displayed.
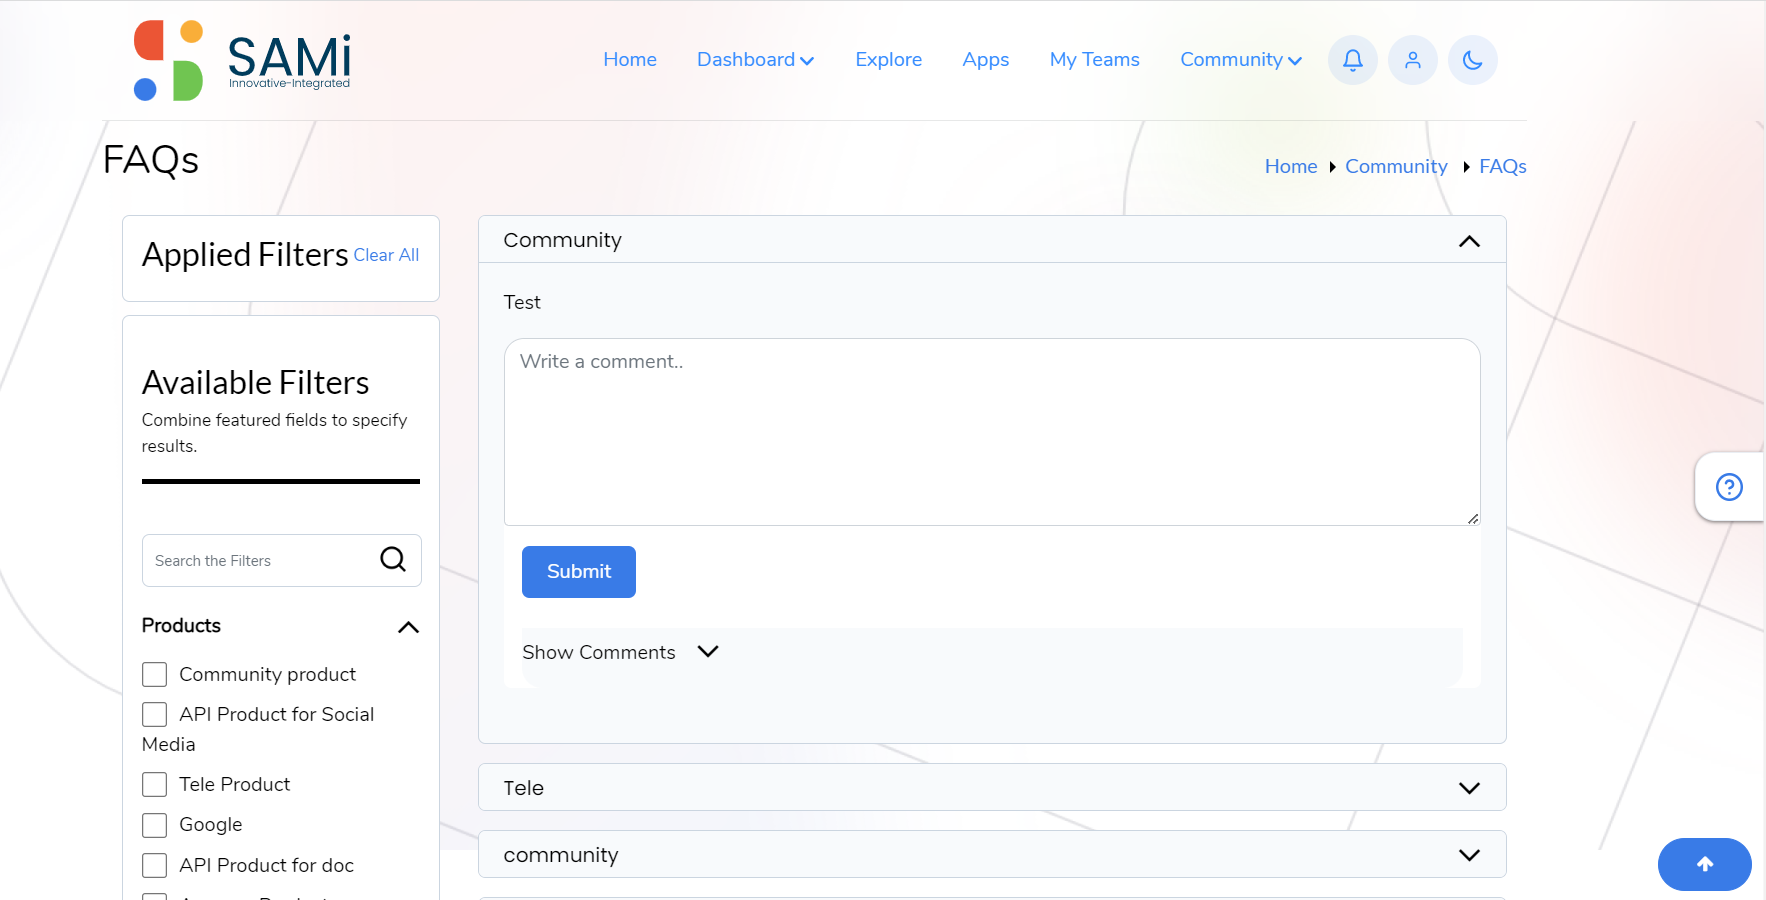
Step 4: In the FAQs page, type in your question in the FAQ text area.
Step 5: Click Submit.
A success message appears, and the FAQ is submitted to the Community page.
Filter and Search FAQs
Step 1: To filter and search FAQs, provide the FAQ name in the search field and click on Magnifying glass icon or press Enter.
The respective FAQ is displayed below on the same page.
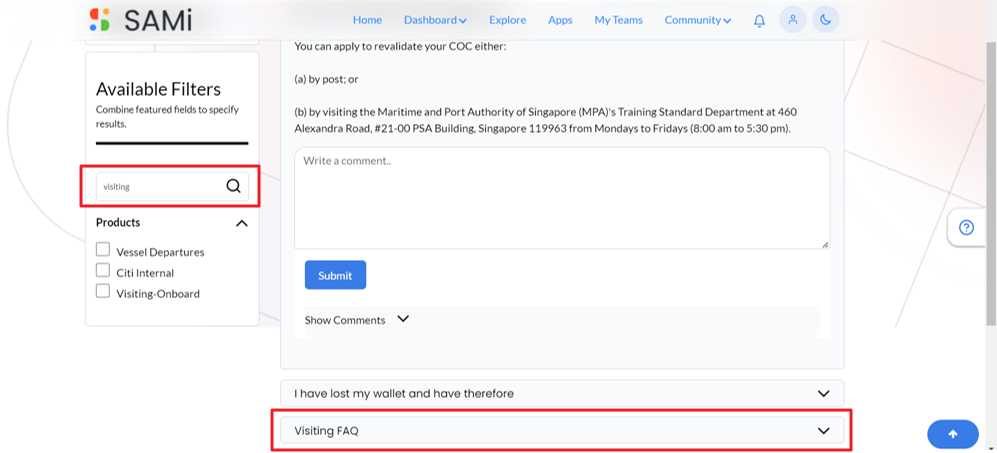
Step 2: Click on Visiting FAQ dropdown to expand and view the complete FAQ.